Is your dream movie night ruined by a stiff neck or a blinding glare on the screen? You’ve chosen the perfect show, settled into the couch, and then… the struggle begins. If you’re wondering how to layout a living room with a TV without these frustrations, you’re not alone. This common design challenge pits our desire for a stylish space against the practical needs of a modern media room, often leaving us with a compromise that satisfies neither.
Forget the compromise. This guide is your blueprint to victory. We’re cutting through the confusion and providing a step-by-step plan to conquer the biggest hurdles: perfect distance, ideal height, smart furniture arrangement, and banishing glare for good. Get ready to transform your space into a comfortable, functional, and immersive home theater that everyone can enjoy.
The Golden Rule: Finding the Ideal TV Viewing Distance
The most common mistake in living room TV layout is placing seating too far from or too close to the screen. This results in either missing fine details and feeling disconnected or straining to see the entire picture at once.
The industry standard for the optimal TV viewing distance is 1.5 to 2.5 times the diagonal screen size of the television. This range ensures the viewer can see the entire image without their eyes having to wander, creating a more comfortable and engaging experience.
For example:
- A 55-inch TV has a sweet spot between 5.5 and 9 feet.
- A 65-inch TV performs best between 6.5 and 11 feet.
- A 75-inch TV needs 7.5 to 13 feet of space.
It’s worth noting that with the advent of 4K and 8K Ultra HD televisions, which have significantly higher pixel density, viewers can sit closer than with older HD models without perceiving individual pixels. This allows for a more immersive experience, leaning towards the 1.5x end of the spectrum, especially for cinematic content.
To simplify this, use the chart below as a quick reference:
| Screen Size (Inches) | Minimum Distance (Feet) | Maximum Distance (Feet) | “Sweet Spot” (Feet) |
|---|---|---|---|
| 55″ | 5.5 | 9.5 | 7 – 8 |
| 65″ | 6.5 | 11.5 | 8 – 9.5 |
| 75″ | 7.5 | 13.5 | 9.5 – 11 |
| 85″ | 8.5 | 15.5 | 11 – 13 |
Before moving any furniture, grab a tape measure. Determine the screen size of your TV and measure the distance from where it will be placed to the potential seating area. This simple step is the most critical foundation for your new living room TV layout.
Eye-Level is the Right Level: Setting the Correct TV Height
Once the distance is settled, the vertical placement is the next crucial factor. The universal rule for a comfortable living room TV layout is that the center of the screen should be at or slightly below the viewer’s seated eye level.
For the average person, seated eye level is typically 42 inches from the floor. This means the center of your TV should be right around that 42-inch mark. This placement allows for hours of viewing without craning the neck up or down, preventing fatigue and discomfort.
This principle directly contradicts one of the most common design trends: mounting the television over the fireplace. While often aesthetically driven, this placement is typically terrible for ergonomics. A TV mounted high above a mantle forces viewers to tilt their heads back, leading to strain. Furthermore, the heat from the fireplace can damage electronics, and routing cables cleanly can be a challenge.
If the fireplace is the only viable option, all is not lost. Solutions exist:
Mantel Mounts: These are specialized pull-down TV mounts that allow the television to be stored high up against the wall but pulled down and forward to a comfortable TV height eye level during viewing. They are the ideal compromise for this challenging scenario.
Tilting Mounts: A simple tilting mount can angle the screen down towards the seating, which helps but does not fully solve the neck strain issue.
The choice between using a TV stand or a wall mount also impacts room planning. A stand offers flexibility and is easier to install, while a wall mount saves floor space and allows for more precise positioning. Consider your room’s traffic flow and design needs when deciding.
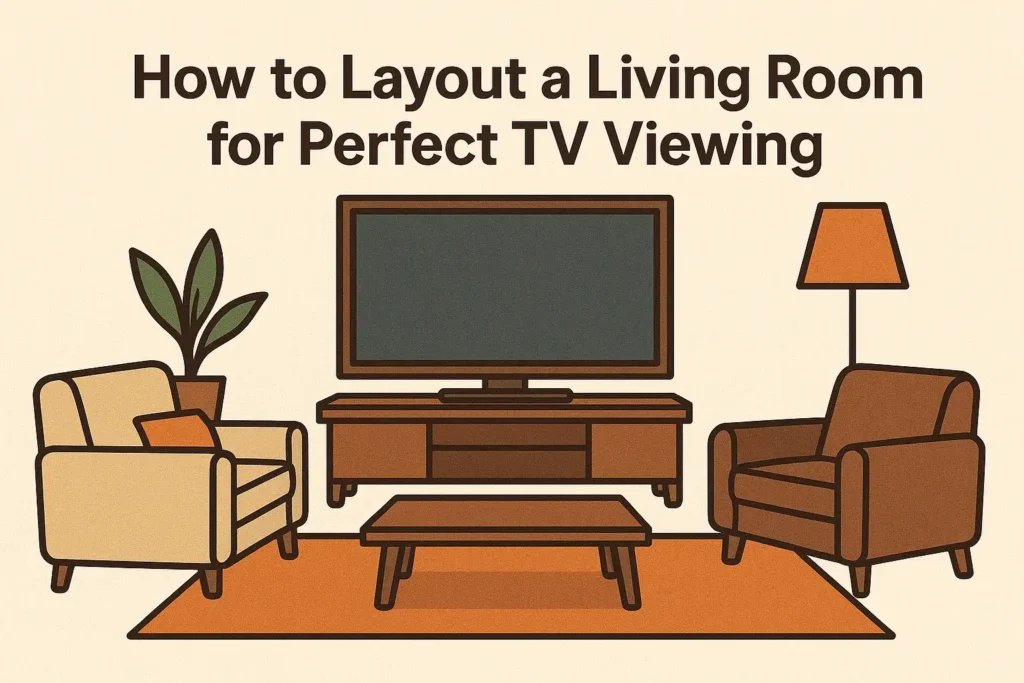
Furniture Arrangement: Building Your Theater Seating
With the TV’s location finalized, the next step is to arrange the furniture to create a clear and comfortable view for everyone. Effective furniture arrangement for TV viewing is about creating a intentional focal point.
The Single-Row Setup: This is the most common configuration. The goal is to face the primary seating—sofa, loveseat, main chairs—directly towards the television. An L-shaped sectional can be excellent for corner placements, while a standard sofa flanked by chairs offers flexibility. The key is to ensure every seat has an unobstructed sightline. Avoid placing seating at sharp angles more than 30-40 degrees from the center of the screen.
The Two-Row Setup: For larger rooms or dedicated home theater spaces, a two-row seating arrangement is the ultimate setup. This often involves a primary sofa followed by a second row of chairs or a raised sofa platform. If building a platform, a rise of 6-12 inches is usually sufficient to provide a clear view over the heads in the front row.
Regardless of the setup, always consider traffic flow. People should be able to walk to other areas of the room or to doorways without crossing directly in front of the screen during a movie. Create clear pathways behind the main seating area whenever possible.
Winning the Battle Against Light and Glare
A perfectly arranged room is useless if the picture on the screen is washed out by reflections. Managing ambient light is a critical, yet often overlooked, component of a successful living room TV layout.
The first step is to identify the enemy: light sources. During the day, note where sunlight enters the room. In the evening, identify lamps, overhead lights, and sconces that cause reflections.
Solutions to reduce TV glare are varied and can be combined:
Window Treatments: This is the most effective solution. Blackout curtains or shades can completely eliminate daytime glare. Even light-filtering shades can diffuse harsh direct sunlight.
Repositioning Lights: Move floor and table lamps so they are not directly opposite the TV screen. Use upward-facing lamps to bounce light off the ceiling for softer, ambient illumination that doesn’t reflect on the screen.
TV Placement: The best solution is often preventive. If possible, avoid placing the TV directly across from large windows or bright light fixtures.
TV Settings: Most modern TVs have an “anti-glare” or “eco” setting that can help mitigate reflections, though often at the expense of some picture brightness or vibrancy.
Integrating Your Sound System (The Final Touch)
Visuals are only half of the immersive experience; audio is the other. Proper speaker placement is the final step in unifying the home theater setup.
For those with a soundbar, the placement is simple: it should be centered directly below or above the television. Ensure it is not enclosed inside a cabinet, as this will muffle the sound. If it’s below the TV, it should be at the front edge of the stand to allow sound to project freely into the room.
For a more advanced surround sound system with separate speakers, placement becomes more involved but follows logical rules. The front left and right channels should be placed at roughly the same height as the TV, angled slightly towards the main listening position. The center channel speaker, which handles dialogue, should be as close to the TV as possible.
The rear surround speakers should be placed to the side and slightly behind the main seating area. The goal is to create a bubble of sound that immerses the viewer in the action. For a detailed guide on making all the right connections, our article on How to Set Up a Soundbar with Any TV is an essential resource. And once your system is configured, you’ll want a clean look; learn all the professional methods in our guide on How to Hide Every Speaker Wire in Your Living Room.
Real-World Examples: Good vs. Bad Layouts
Theory is best understood through practice. Below are two common scenarios showing ineffective and effective living room TV layout ideas.
Example 1: The Small Rectangular Room
The Bad Layout: The TV is crammed into a corner, angling it awkwardly. The sofa is pushed against the far wall, making the TV viewing distance too far for the screen size. A large armchair blocks the pathway to the balcony, disrupting traffic flow.
The Good Layout: The TV is placed on the short wall, centered and at the correct TV height eye level. The sofa is moved closer, within the ideal viewing range, and a slim console table behind it defines the space without obstructing movement. Two small chairs are placed to the side, providing additional seating without blocking the view. This furniture arrangement for TV prioritizes the viewing experience while maintaining room functionality.
Example 2: The Room with a Fireplace
The Bad Layout: The TV is mounted high above the fireplace mantle, causing neck strain. The sofa is placed directly across, but the viewing angle is uncomfortable. The room’s focal point is split between the fire and the TV.
The Good Layout (Compromise): The TV is placed on a low stand on a adjacent wall, making it the room’s sole focal point. The sofa and chairs are arranged in a cozy grouping facing the TV. The fireplace remains a beautiful architectural element to the side, enjoyed for ambiance rather than as a competing center of attention. This is a classic solution for the how to arrange living room furniture with tv and fireplace dilemma.
Conclusion: Your Perfect Viewing Room Awaits
Creating the perfect living room TV layout is not about luck; it’s about applying a set of logical, human-centric design rules. It begins with measuring for the correct TV viewing distance, ensuring the screen is at a comfortable TV height eye level, and arranging furniture to maximize sightlines and traffic flow. Finally, controlling light and properly placing speakers complete the transformation from a simple room to a personalized home theater.
The effort is well worth it. By following this guide, you can eliminate everyday annoyances and create a space designed for maximum relaxation and enjoyment. The path to perfect movie nights and thrilling game days starts with a tape measure and a plan.
What’s the biggest challenge you’ve faced when arranging your living room around a TV? Share your experiences and questions in the comments below! And when you’re ready to take your setup to the next level, explore our inspiration guide on How to Build a Home Theater on a Budget.